What is Cloudfront
Amazon CloudFront is a fast content delivery network (CDN) service that securely delivers data, videos, applications, and APIs to customers globally with low latency, high transfer speeds, all within a developer-friendly environment. CloudFront is integrated with AWS – both physical locations that are directly connected to the AWS global infrastructure, as well as other AWS services. CloudFront works seamlessly with services including AWS Shield for DDoS mitigation, Amazon S3, Elastic Load Balancing or Amazon EC2 as origins for your applications, and Lambda@Edge to run custom code closer to customers’ users and to customize the user experience. Lastly, if you use AWS origins such as Amazon S3, Amazon EC2 or Elastic Load Balancing, you don’t pay for any data transferred between these services and CloudFront.
To use Cloudfront we have to follow these steps:-
Create an instance with a web server configured attached with 1gb EBS (Elastic Block Storage) make our data persistent.
Create S3 Bucket and adding static files to it.
Create Origin Access Identity.
Create Cloudfront Distribution.
Updating Bucket policy.
Let's Start:-
Create an instance with a web server configured attached with 1gb EBS (Elastic Block Storage) make our data persistent.
Command to create an instance
aws ec2 run-instances --image-id ami-0e306788ff2473ccb --instance-type t2.micro --count 1 --subnet-id subnet-76a4dd3a --key-name task3 --security-group-ids sg-0475e79b6a3f14d6c --user-data "file://C:\Users\Sahil Negi\Desktop\script.txt" --block-device-mappings "file://C:\Users\Sahil Negi\Desktop\mapping.json"
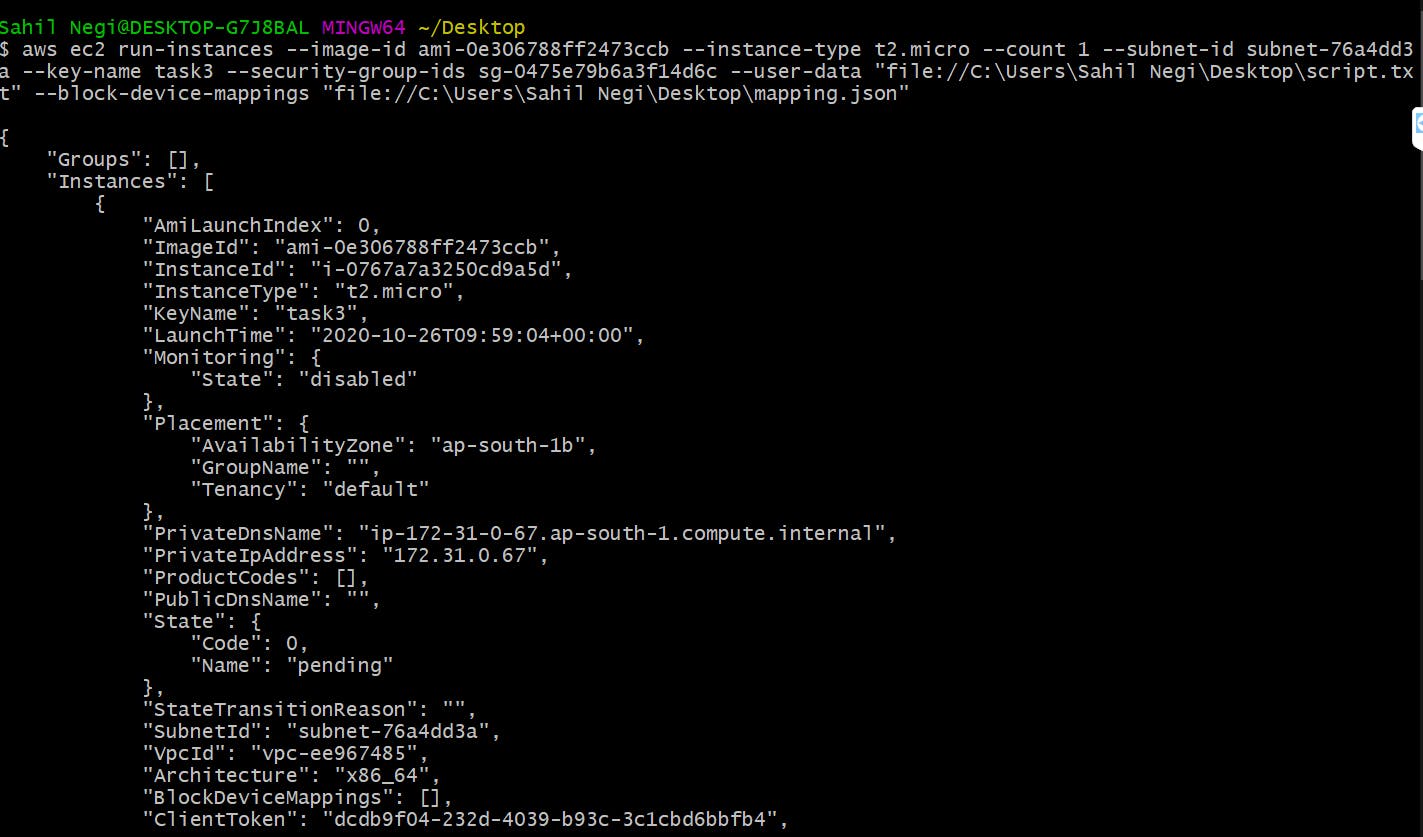
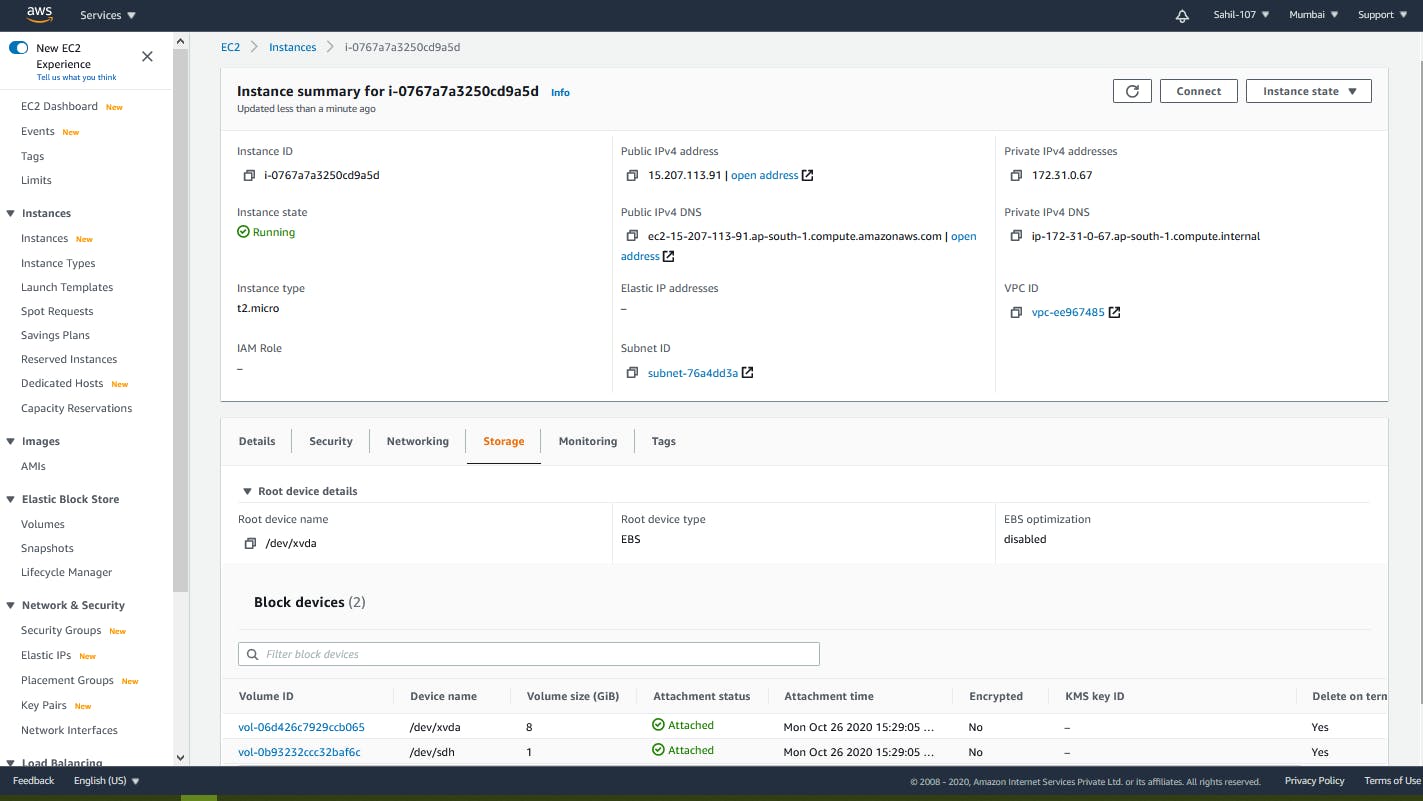
In the above command, I have uploaded two JSON files with it: mapping.json and script.json. mapping.json with automatically create EBS of 1GB and attach it to the instance script.json contains the commands which will run automatically when the instance will launch, the commands in script.json will format the 1GB EBS partition and also download the httpd and configure it. scripts.json also install git and also clone my git repository directly into the /var/www/html.
mapping.json contains:-
[
       {
           "DeviceName": "/dev/sdh",
           "Ebs": {
               "VolumeSize": 1
           }
       }
]
scripts.json contains:-
#!/bin/bash
sudo yum install httpd git -y
sudo systemctl start httpd
sudo systemctl enable httpd

sudo printf 'o\nn\np\n1\n\n\nw\n' | sudo fdisk /dev/xvdh
sudo mkfs.ext4  /dev/xvdh
sudo mount  /dev/xvdh  /var/www/html

sudo rm -rf /var/www/html/*

sudo git clone https://github.com/sahil-107/arth-task-6 /var/www/html/
Create S3 Bucket and adding static files to it.
- Command to create S3 bucket
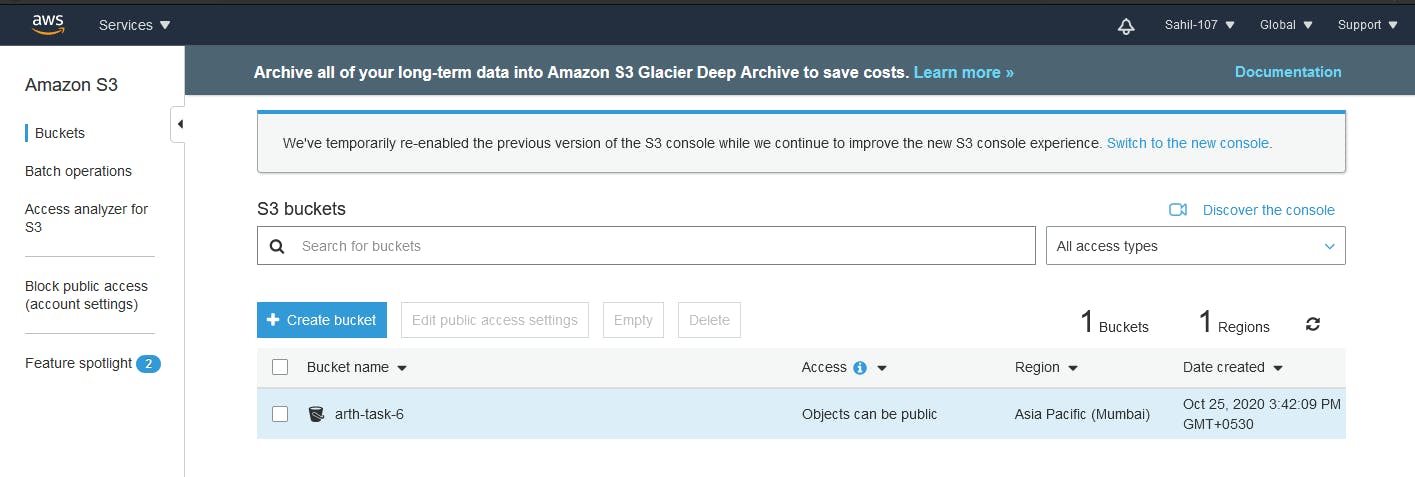
aws s3api create-bucket --bucket arth-task-6 --region ap-south-1 --create-bucket-configuration LocationConstraint=ap-south-1
This will create S3 bucket with the name arth-task-6 in the region ap-south-1.

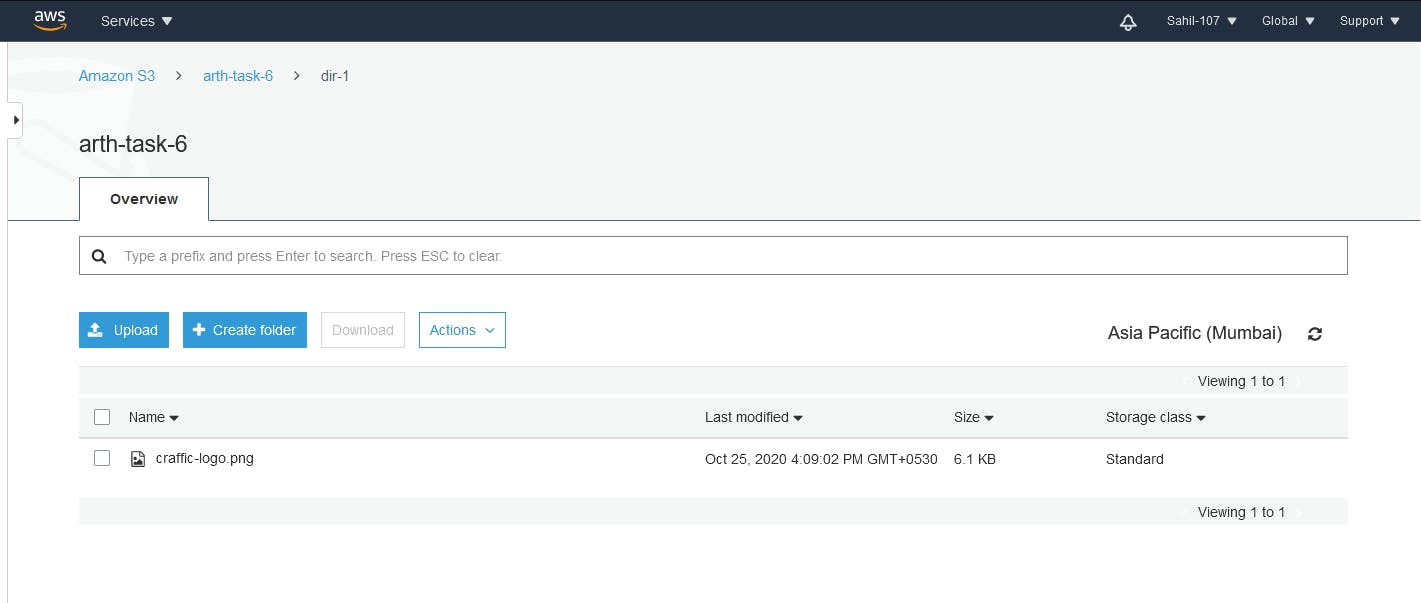
- Adding static file into the bucket
aws s3api put-object --bucket arth-task-6 --key dir-1/craffic-logo.png --body "C:\Users\Sahil Negi\Desktop\craffic-white.png"
This will upload craffic-white.png (photo) in the bucket in a directory named dir-1 with the name of craffic-logo.png.

Create Origin Access Identity.
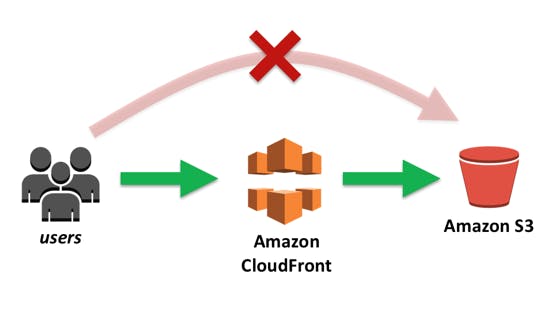
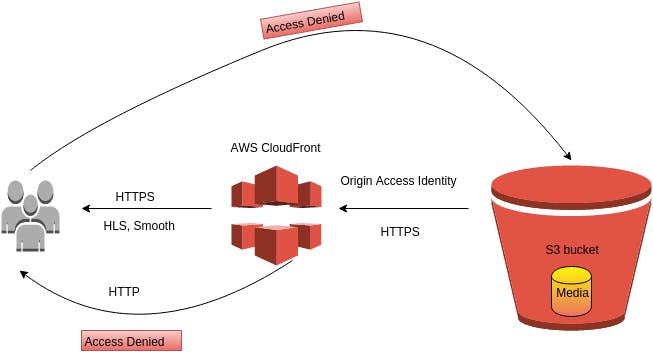
The Origin Access Identity (OAI) is the primary way to make CloudFront access private content stored in S3. Without it, CloudFront is like an anonymous user, it only has access to content everybody else has access to. When you make the bucket private, you forbid even CloudFront from accessing it. In many real-world scenarios, you want your visitors to access the content only through the distribution, and not directly. This is where OAI helps. When you point the distribution to an S3 bucket, you have the option to create an OAI and provide access to the content. It can be done by updating the bucket’s resource policy either by hand or by checking the “Grant Read Permissions on Bucket” option and let CloudFront do that for you automatically.
Command to create Origin Access Identity.
aws cloudfront create-cloud-front-origin-access-identity --cloud-front-origin-access-identity-config CallerReference="arth-task-6",Comment="task 6 OAI"
This will create Origin Access Identity with comment task 6 OAI.


Create Cloudfront Distribution.
Command to create Cloudfront distribution
aws cloudfront create-distribution --distribution-config "file://C:\Users\Sahil Negi\Desktop\conf.json"
This will create Cloudfront distribution and take configuration from conf.json.
conf.json contains:-
{
    "CallerReference": "arth-task-6",
    "Aliases": {
        "Quantity": 0
    },
    "DefaultRootObject": "dir-1/craffic-logo.png",
    "Origins": {
        "Quantity": 1,
        "Items": [
            {
                "Id": "arth-task-6.s3.amazonaws.com-arth-task-6",
                "DomainName": "arth-task-6.s3.amazonaws.com",
                "OriginPath": "",
                "CustomHeaders": {
                    "Quantity": 0
                },
                "S3OriginConfig": {
                    "OriginAccessIdentity": "origin-access-identity/cloudfront/E10KPLM4H7EVSK"
                }
            }
        ]
    },
    "OriginGroups": {
        "Quantity": 0
    },
    "DefaultCacheBehavior": {
        "TargetOriginId": "arth-task-6.s3.amazonaws.com-arth-task-6",
        "ForwardedValues": {
            "QueryString": false,
            "Cookies": {
                "Forward": "none"
            },
            "Headers": {
                "Quantity": 0
            },
            "QueryStringCacheKeys": {
                "Quantity": 0
            }
        },
        "TrustedSigners": {
            "Enabled": false,
            "Quantity": 0
        },
        "ViewerProtocolPolicy": "allow-all",
        "MinTTL": 0,
        "AllowedMethods": {
            "Quantity": 2,
            "Items": [
                "HEAD",
                "GET"
            ],
            "CachedMethods": {
                "Quantity": 2,
                "Items": [
                    "HEAD",
                    "GET"
                ]
            }
        },
        "SmoothStreaming": false,
        "DefaultTTL": 86400,
        "MaxTTL": 31536000,
        "Compress": false,
        "LambdaFunctionAssociations": {
            "Quantity": 0
        },
        "FieldLevelEncryptionId": ""
    },
    "CacheBehaviors": {
        "Quantity": 0
    },
    "CustomErrorResponses": {
        "Quantity": 0
    },
    "Comment": "",
    "Logging": {
        "Enabled": false,
        "IncludeCookies": false,
        "Bucket": "",
        "Prefix": ""
    },
    "PriceClass": "PriceClass_All",
    "Enabled": true,
    "ViewerCertificate": {
        "CloudFrontDefaultCertificate": true,
        "MinimumProtocolVersion": "TLSv1",
        "CertificateSource": "cloudfront"
    },
    "Restrictions": {
        "GeoRestriction": {
            "RestrictionType": "none",
            "Quantity": 0
        }
    },
    "WebACLId": "",
    "HttpVersion": "http2",
    "IsIPV6Enabled": true
}
Now you can see in the above code, we've given Origin Access Identity in the:-
"S3OriginConfig": {
                    "OriginAccessIdentity": "origin-access-identity/cloudfront/E10KPLM4H7EVSK"
                }
Now our Cloudfront distribution can access S3 storage, but we also need to update our S3 bucket policy so that S3 also allows specific Cloudfront distributions to access it files so in next stop we will update bucket policy.
Updating Bucket policy.
Command to update bucket policy
aws s3api put-bucket-policy --bucket arth-task-6 --policy "file://C:\Users\Sahil Negi\Desktop\bucket-policy.json"
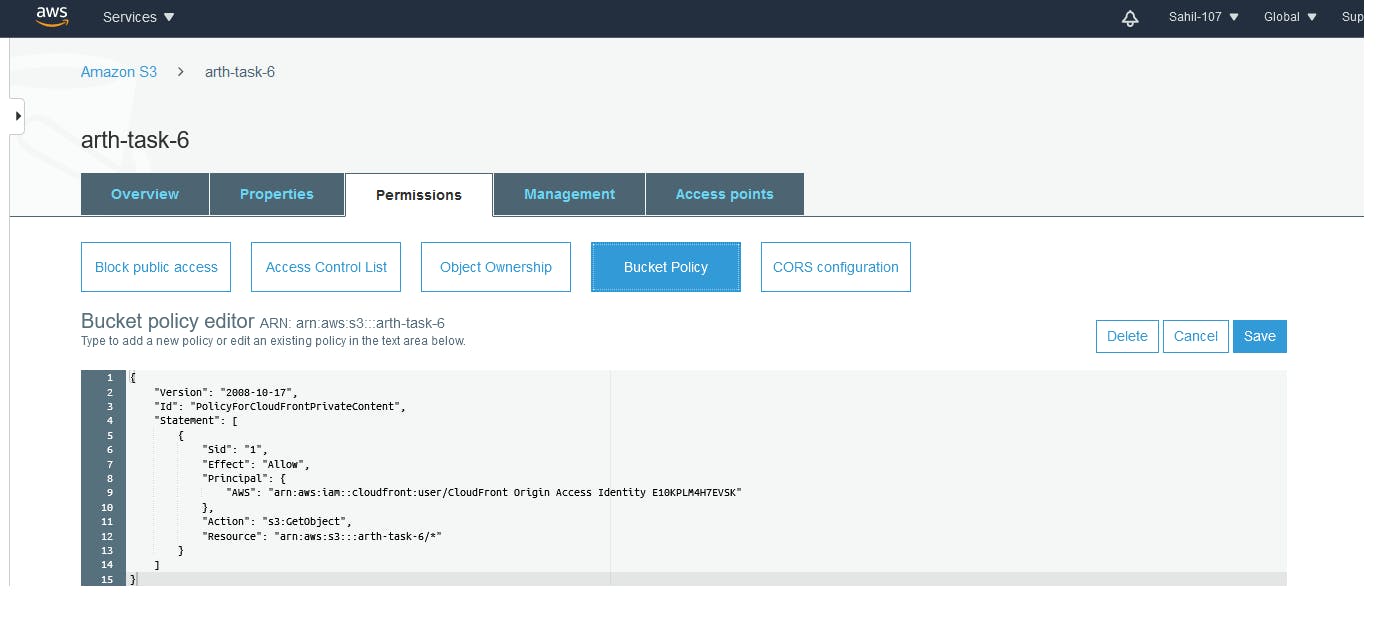
This will update the bucket policy. The bucket-policy.json contains the policy.
bucket-policy.json contains:-
{
    "Version": "2008-10-17",
    "Id": "PolicyForCloudFrontPrivateContent",
    "Statement": [
        {
            "Sid": "1",
            "Effect": "Allow",
            "Principal": {
                "AWS": "arn:aws:iam::cloudfront:user/CloudFront Origin Access Identity E10KPLM4H7EVSK"
            },
            "Action": "s3:GetObject",
            "Resource": "arn:aws:s3:::arth-task-6/*"
        }
    ]
}
Here we've given the Cloudfront Origin Access Identity.

