


Linux is a multi-user system, which means that more than one person can interact with the same system at the same time. As a system administrator, you have the responsibility to manage the system’s users and groups by creating and removing users and assign them to different groups.
In today's task we'll talk about creating the user in RedHat Linux and giving it different permissions to perform the tasks, I'm using RedHat Enterprise Linux 8 to perform this task so let's start:-
Commands used:-
When managing users via command line, the following commands are used:
useraddusermoduserdelpasswd
The files affected include /etc/passwd which stores user accounts information and /etc/shadow , which stores secure user account information.
Creating Users:-
The useradd command creates new users and adds them to the system. It will create a default user account with its UID, automatically create a home directory where default user settings will be stored, /home/username/ , and set the default shell to /bin/bash .
To create the user:-
useradd <username>
Use sudo before useradd is you are not using root account.
Now to access the account set the password by using:-
passwd <username>
Type the password twice when the program prompts you to.
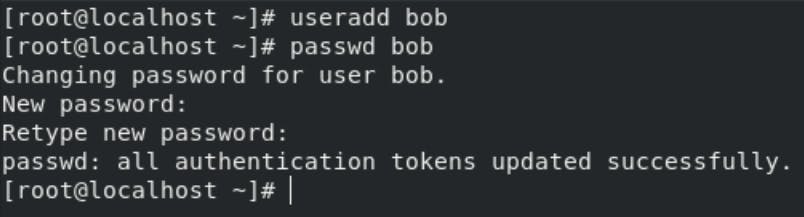
Running the useradd bob command creates an account named bob. If you run cat /etc/passwd to view the content of the /etc/passwd file, you can learn more about the new user from the line displayed to you:

bob has been assigned a UID (User identifier is a unique positive integer assigned by the Linux system to each user. The UID and other access control policies are used to determine the types of actions a user can perform on system resources) of 1002, which reflects the rule that the default UID values from 0 to 499 are typically reserved for system accounts.
Creating a User with Specific User ID:-
By default, when a new user is created, the system assigns the next available UID from the range of user IDs specified in the login.defs file.
Invoke useradd with the -u (--uid) option to create a user with a specific UID. For example to create a new user named bob with UID of 1500 you would type:
sudo useradd -u 1500 bob
GID, group ID of User Private Group, equals to UID. The home directory is set to /home/bob and login shell to /bin/bash . The letter x signals that shadow passwords are used and that the hashed password is stored in /etc/shadow .
Creating a User with Specific Group ID:-
Linux groups are organization units that are used to organize and administer user accounts in Linux. The primary purpose of groups is to define a set of privileges such as reading, writing, or executing permission for a given resource that can be shared among the users within the group.
When creating a new user, the default behavior of the useradd command is to create a group with the same name as the username, and same GID as UID.
The -g (--gid) option allows you to create a user with a specific initial login group. You can specify either the group name or the GID number. The group name or GID must already exist.
The following example shows how to create a new user named bob and set the login group tousers` type:
sudo useradd -g users bob
So this is the process of creating a user in Linux. Now the second part is to give permissions to the with the help of sudoers file.
The sudoers file is a file Linux and Unix administrators use to allocate system rights to system users. This allows the administrator to control who does what. Remember, Linux is built with security in mind. When you want to run a command that requires root rights, Linux checks your username against the sudoers file. This happens when you type the command “sudo”. If it determines, that your username is not on the list, you cannot run the command/program logged in as that user.
You can find the sudoers file in /etc/sudoers . Use the ls -l /etc/ command to get a list of everything in the directory. Using -l after ls will give you a long and detailed listing.
What is Visudo?
The sudo command is configured through a file located at /etc/sudoers . Because improper syntax in the /etc/sudoers file can leave you with a broken system where it is impossible to obtain elevated privileges, it is important to use the visudo command to edit the file.
The visudo command opens a text editor like normal, but it validates the syntax of the file upon saving. This prevents configuration errors from blocking sudo operations, which may be your only way of obtaining root privileges.
Traditionally, visudo opens the /etc/sudoers file with the vi text editor. Ubuntu, however, has configured visudo to use the nano text editor instead.
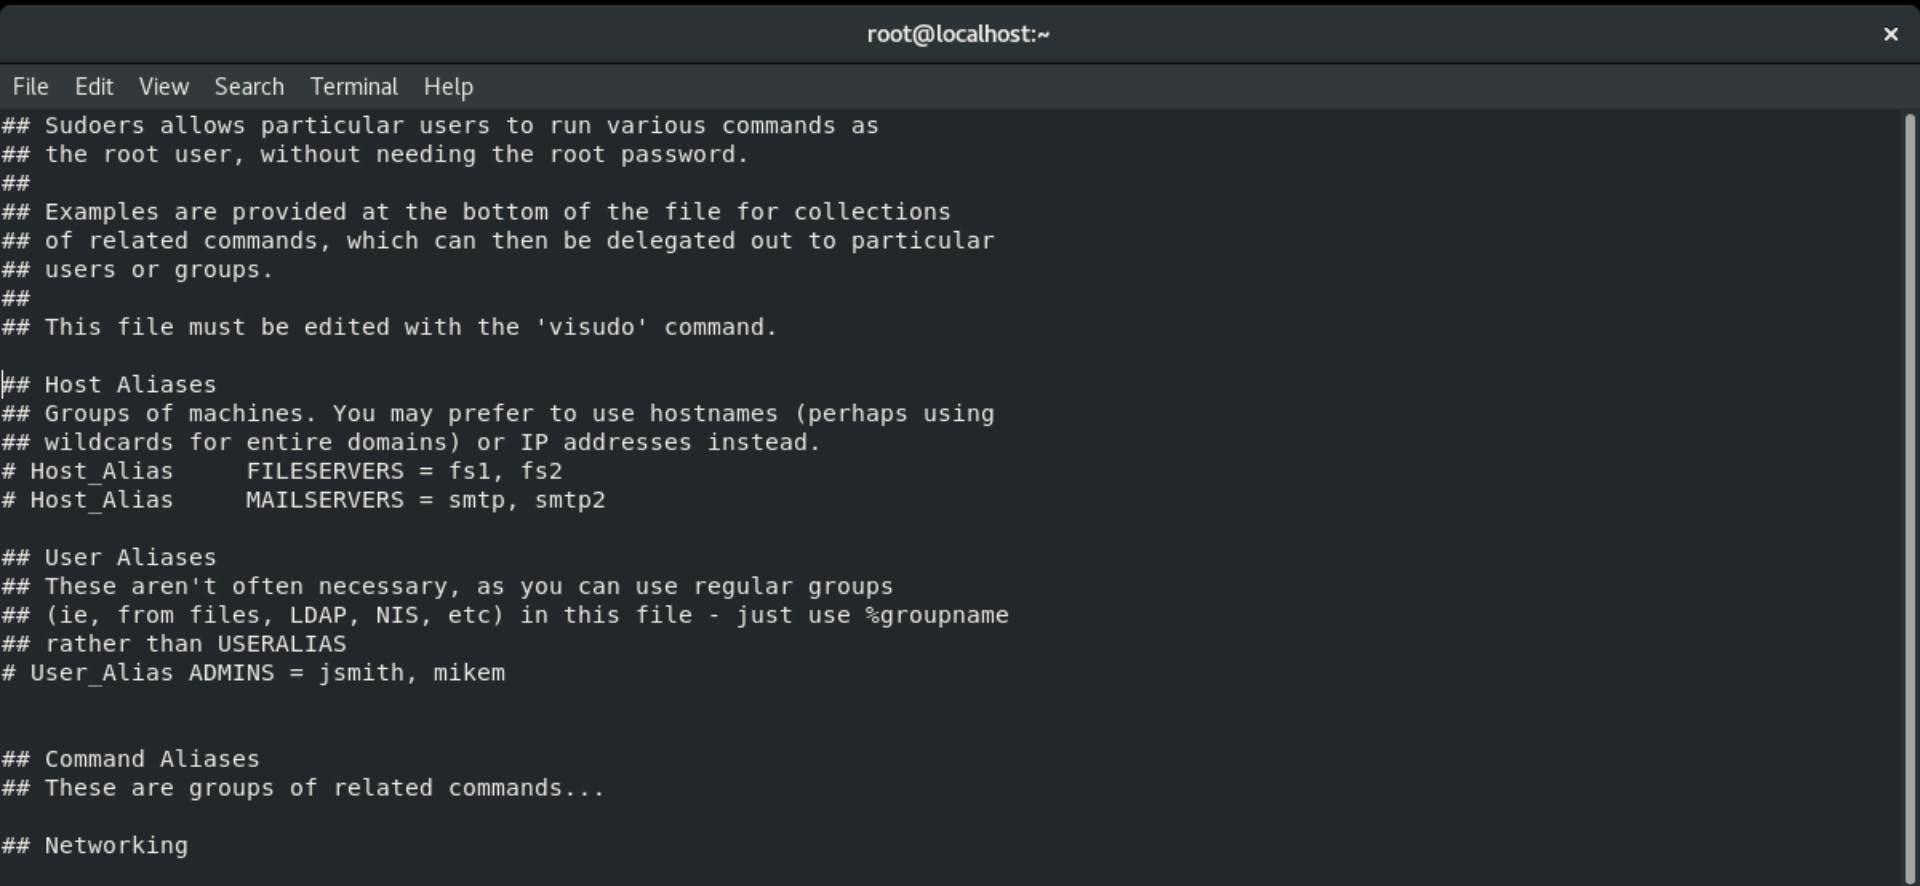
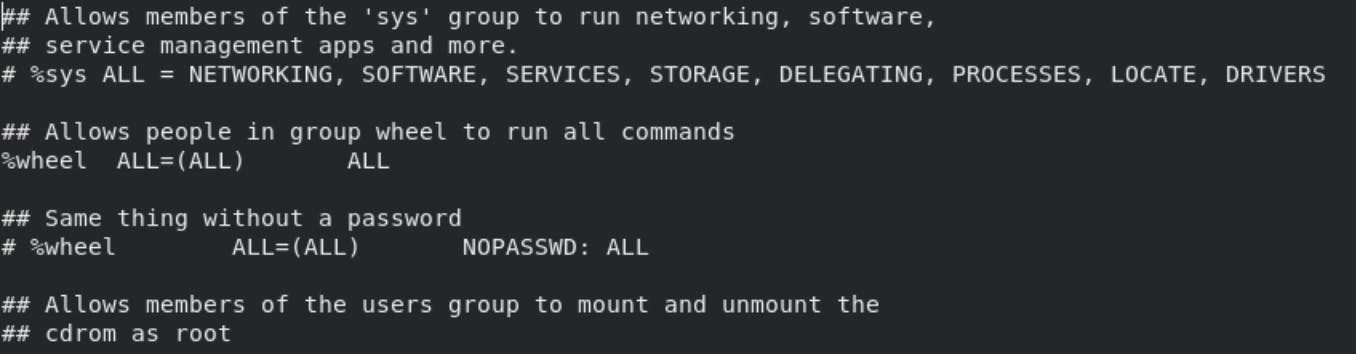
Lets skip all the way down to the section that says. “# User privilege specification”. Under that comment, the user “root” is given system privileges. The variable ALL means all in the root. The (ALL) ALL value represents all privileges, more or less, at least that is what I determined it to be.
If you want to add another user, like yourself, under the line root ALL=(ALL) ALL, type:
username ALL=(ALL) ALL
substituting username with your account name. Now your user account has sudo rights, or you are finally on that VIP list.

Default Lines:-
The first line, “Defaults env_reset”, resets the terminal environment to remove any user variables. This is a safety measure used to clear potentially harmful environmental variables from the sudo session.
The second line, Defaults mail_badpass, tells the system to mail notices of bad sudo password attempts to the configured mailto user. By default, this is the root account.
The third line, which begins with “Defaults secure_path=…”, specifies the PATH (the places in the filesystem the operating system will look for applications) that will be used for sudo operations. This prevents using user paths that may be harmful.
User Privilege Lines:-
The fourth line, which dictates the root user’s sudo privileges, is different from the preceding lines. Let’s take a look at what the different fields mean:
root ALL=(ALL:ALL) ALL
The first field indicates the username that the rule will apply to (root).
root ALL=(ALL:ALL) ALL
The first “ALL” indicates that this rule applies to all hosts.
root ALL=(ALL:ALL) ALL
This “ALL” indicates that the root user can run commands as all users.
root ALL=(ALL:ALL) ALL
This “ALL” indicates that the root user can run commands as all groups.
root ALL=(ALL:ALL) ALL
The last “ALL” indicates these rules apply to all commands.
This means that our root user can run any command using sudo, as long as they provide their password.
Group Privilege Lines:-
The next two lines are similar to the user privilege lines, but they specify sudo rules for groups. Names beginning with a % indicate group names.
So this is all about adding user and giving permissions to it.